
Any brush can be tuned: tip spacing, tapering at the ends, shape, texture, pressure response and much more. Every change shows up right away – on the sample stroke, on the try-out area and in your next stroke on the canvas.
Opening the settings
To change a brush:
- Open the brush library (tap Brush a second time).
- Tap the gear icon on the brush card.
- Choose Edit brush.
To make your own brush: tap My brush in the library header. The window opens with a copy of the selected brush under a new name – change that.
The full-screen Brush settings window opens.
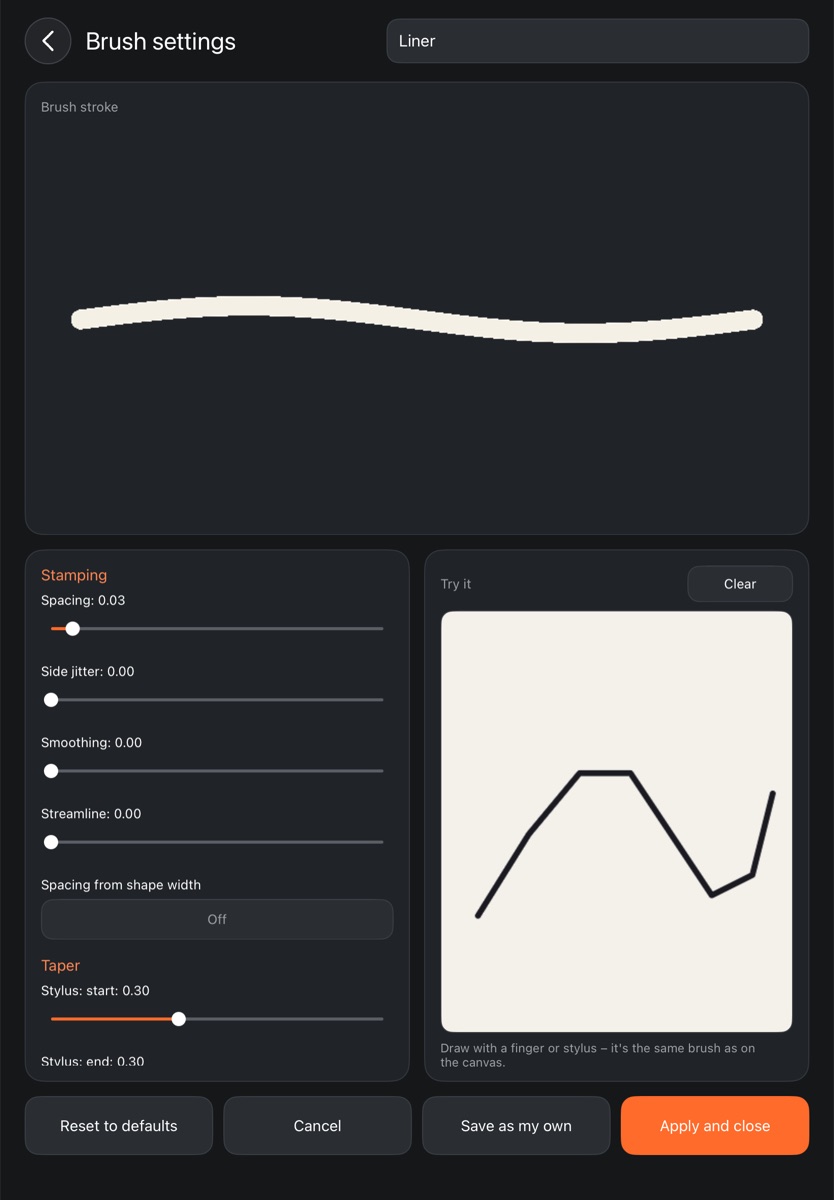
What's in the window
- Brush name – the field at the top. It's used when you tap Save as my own.
- Parameters – one scrolling column, split into groups.
- Brush stroke – a sample stroke, redrawn every time you move a slider.
- Try it – an area where you can draw with a finger or pen using the same brush as on the canvas. Clear wipes it.
In landscape the parameters are on the left, the stroke and try-out area on the right. In portrait the stroke is on top, with parameters and the try-out area below. On a phone everything is stacked.
Parameter groups
Only parameters that actually change something for this brush are shown: a round tip, for example, has no rotation. A group where nothing applies is hidden entirely.
- Stamping – Spacing between tips, Smoothing, Streamline (the line trails the pen slightly and comes out smoother), tip scatter and count.
- Taper – how the stroke narrows at the start and end, separately for stylus and finger.
- Shape – the tip image, Rotation, Roundness, Scatter, Follow direction.
- Texture – grain inside the stroke: Depth, Scale, Contrast, Dry brush, Paper.
- Compositing – Flow, Hardness, Wet edge, Blend mode and more.
- Jitter – random changes in size, rotation and opacity along the stroke.
- Color – hue, saturation and brightness jitter.
- Curves – how pressure, pen tilt and speed affect size and opacity. Drag the curve's points to change it.
- Mixing – how the brush mixes its paint with what's already there: Smudge, Paint pickup, Dilution, Wet-in-wet.
- Dual brush – a second shape with its own size, spacing and mode, laid over the first to give the stroke a pattern.
- Relief – paint thickness for impasto brushes.
- Uses – default size and opacity when the brush works as a brush, an eraser or for smudging, plus the limits of the size slider.
Switches show On or Off; options are picked with a row of buttons.
Your own shape and texture
The Shape, Texture and Second shape rows show a thumbnail. Tap the row to open a picker:
- the first tile is Circle (for shapes) or No texture;
- then every shape or texture in the app and in your imported brushes;
- the Own shape or Own texture button at the top picks an image from your device.
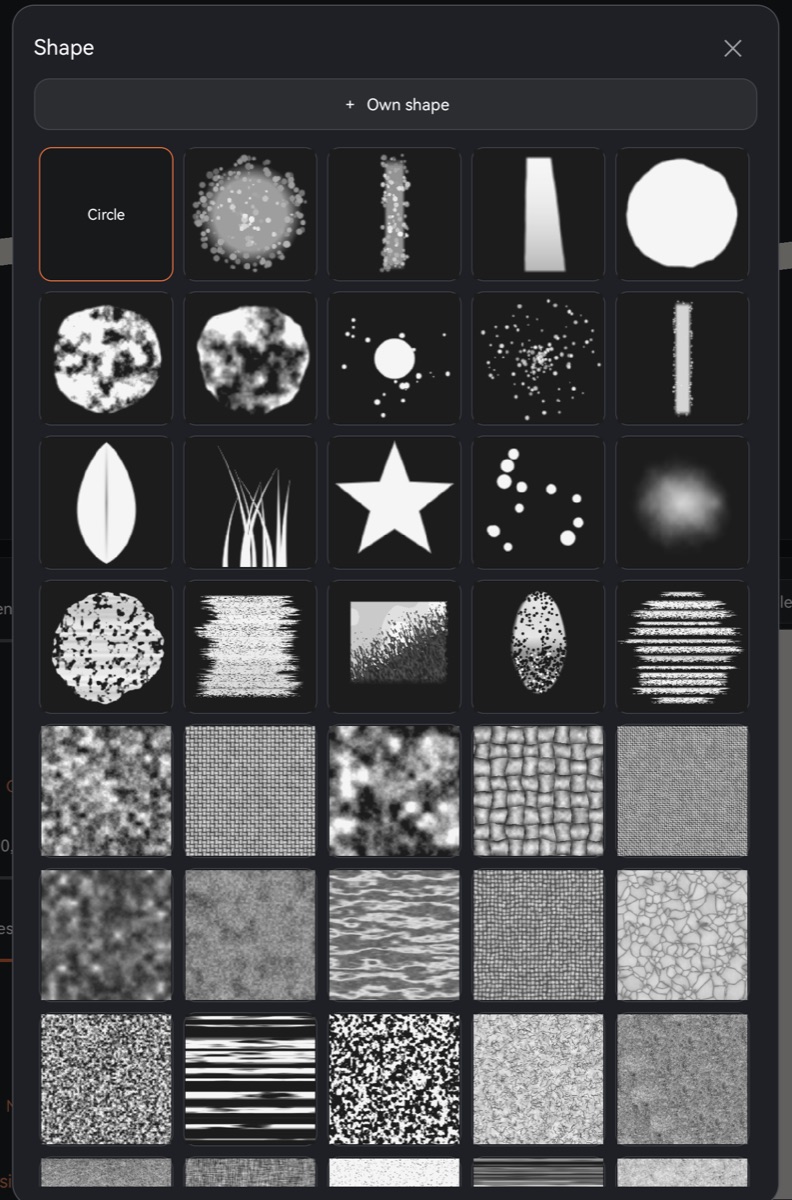
For an image with transparency, the shape follows the transparency. For an image without it, dark areas become paint and light areas become empty, like ink on paper.
Buttons at the bottom
- Reset to defaults – restore the brush's factory settings. Your saved edits to this brush are lost.
- Cancel – close the window and put the brush back the way it was.
- Save as my own – save the result as a new brush with the name from the field. The original brush stays as it was.
- Apply and close – keep the changes in this brush for good: next time you pick it, and in other artworks, it will already be changed. This works for built-in brushes too – Reset to defaults brings them back.
When you're making a brush with My brush, there's no Apply and close – save the new brush with Save as my own.