
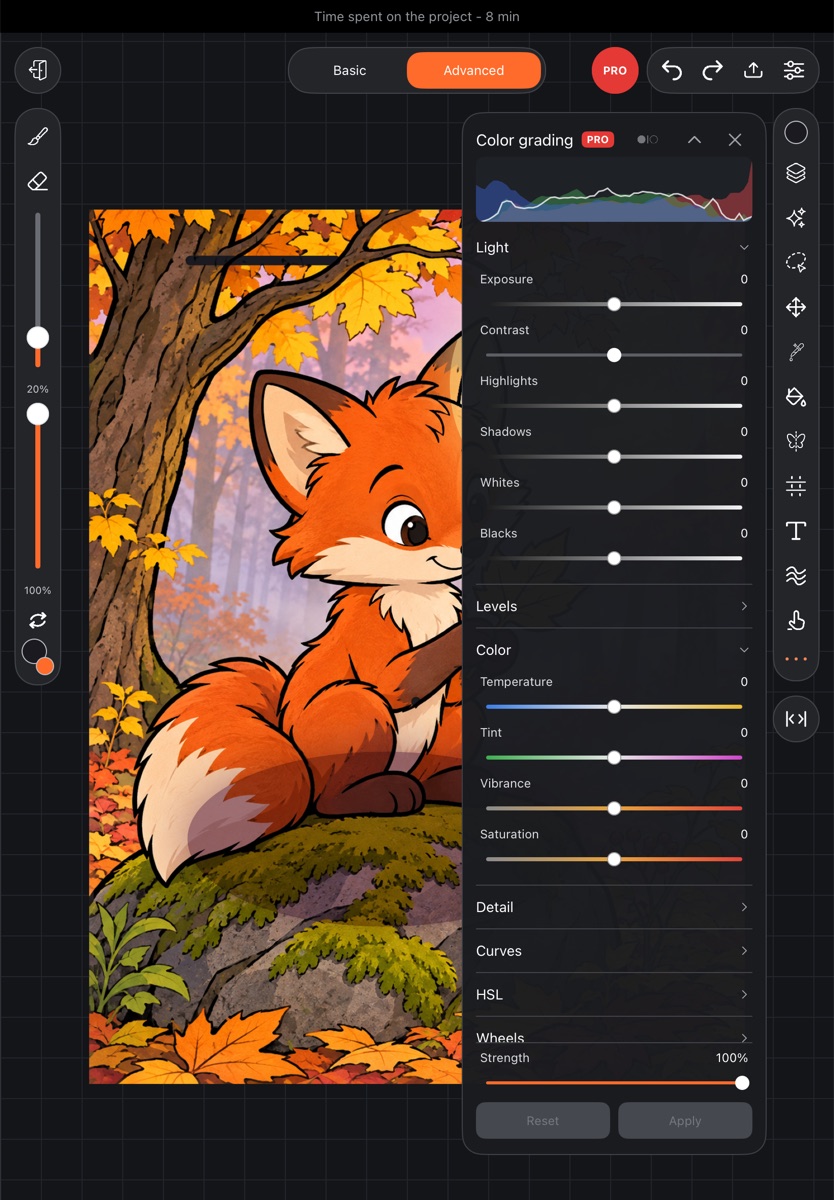
Color grading adjusts the light and color of a layer the way photo editors do: exposure, levels, curves, individual colors, tinting shadows and highlights, LUT files. Changes show at once and are written into the layer when you tap Apply.
Open it
- In the layers panel, select the layer you want to change.
- Tap the round PRO button at the top of the screen and choose Color grading.
A side panel opens. At the top is the layer's histogram including your changes, below it the sections one under another, and at the very bottom the Strength slider with Reset and Apply. Tap a section header to fold or unfold it – the app remembers which sections you keep open.
With a selection on the canvas, the change applies only inside it. A handy way to select is the Range tool – select by brightness or color – from the same PRO list.
Sections
- Light – Exposure, Contrast, Highlights, Shadows, Whites, Blacks.
- Levels – channel (RGB, R, G, B), Black point, Midtones, White point, Output black, Output white. Auto and Auto contrast set levels for you. Three eyedroppers – this is black, this is grey, this is white: tap one, then tap the canvas at the point you want.
- Color – Temperature, Tint, Vibrance, Saturation.
- Detail – Clarity and Dehaze.
- Curves – a master curve plus R, G and B. Tap to add a point, double-tap to delete one.
- HSL – eight color bands shown as colored circles, from red to magenta. Pick a band to get its Hue, Saturation and Luminance sliders.
- Wheels – three color wheels: Shadows, Midtones and Highlights. Drag the point in a wheel to tint that tonal range; next to it is its Luminance. Below them is Balance.
- Styles – ready-made looks, a LUT from a file and your own styles (see below).
Double-tap any slider to reset it to zero. The Strength slider at the bottom weakens or boosts the whole adjustment at once.
Compare and apply
- The Before/After button in the panel header: hold it to see the layer without changes, let go to see them again.
- Reset – set everything back to zero.
- Apply – write the adjustment into the layer as one step.
Styles and LUTs
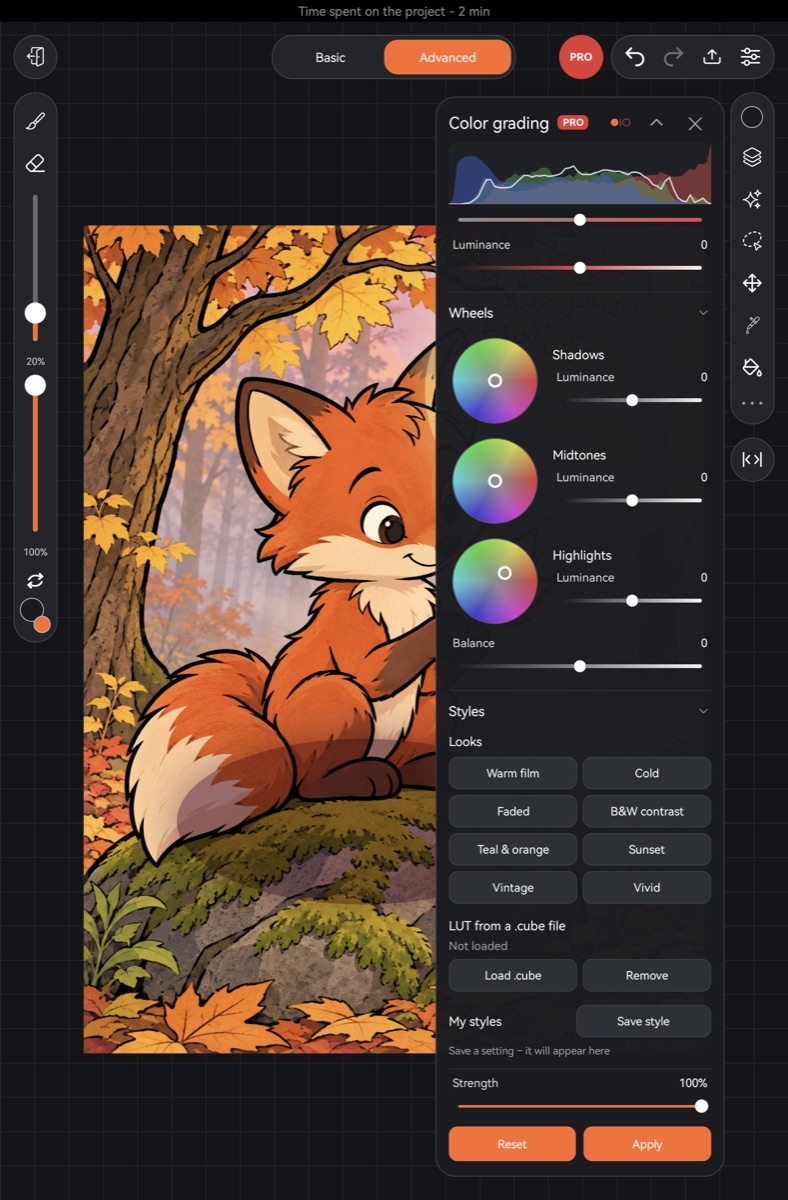
Looks – eight built in: Warm film, Cold, Faded, B&W contrast, Teal & orange, Sunset, Vintage, Vivid. Tapping a look sets the sliders, and you can fine-tune from there.
LUT from a .cube file:
- Tap Load .cube and choose the file.
- Use LUT amount to set how strongly it applies.
- Remove turns the LUT off.
If the file can't be used, you'll see “Could not read the .cube file”.
My styles:
- Save style – store the current setting under a name.
- Tap a style's name to apply it.
- .cube next to a style exports it as a LUT file to use in another artwork or app. On Android the file goes to the Download/Cloudfarb folder; on iPad and iPhone the system share sheet opens.
- ✕ deletes the style.
When it won't work
Color grading works on one regular layer. It doesn't work on a group, a text or vector layer, or a hidden or locked layer, and it won't open while several layers are checked in the layers panel.